

One useable part of a mobile phone is its LCD, which can be used in many applications where we need data visually presented.
Nokia 3310 has a LCD with 84 х 84 dots, that isn't that hard to get and can be very useful in DIY (do it yourself) electronics.
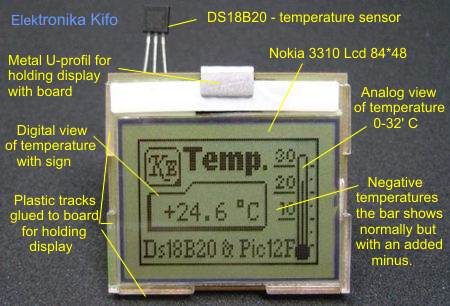
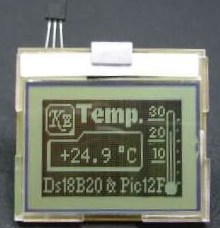
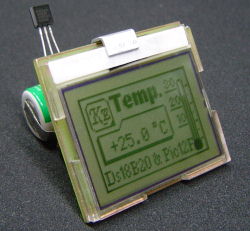
This page describes a device I designed to test such a display and turned out to be the circuit that I am proud to share with you. Since my motto is “simplicity in construction”, with a few parts you will be able to create a relatively accurate and visually appealing thermometer.
- Voltage ....................... 3 - 3.3 V
- Range (1) ....................-55 do 125' C
- Min. temp. step ............ 0,1 ' C
- Max. error ................... +/- 0,5 ' C
- Max. resolution ............. 0,0625 ' C
- Temp. refreshed every.... 1,2 sec.
- Dimensions ................... 40 * 38 mm
- 2 modes of display .......normal/inverse
- Llcd ............................. 84 * 48 pixela
- Amperage (2)................. 0,2 mA - 0,8 mA
Amperage of the device varies because of the conversion of DS18B20 (measuring the temperature and reading the measured temperature), that lasts about 700 ms and at that time the device uses 0.8 mA, for the next 500 ms the device is in “sleep” mode and uses 0.2 mA.
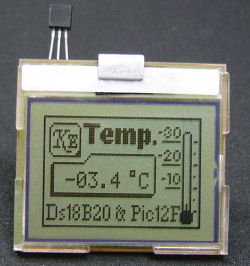
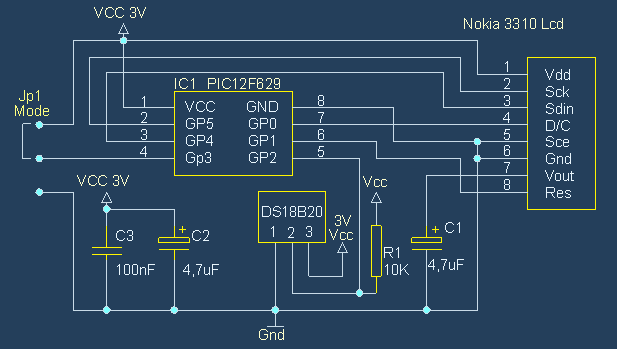
The LCD supports two modes of operation (normal and inverse), the jumper placed on the back of the device is used for changing modes. Negative temperatures are given a “minus”, the bar shows temperatures normally but with an added minus. In this picture I charged the device with a 3.6 V lithium battery. Do not use a greater voltage then this because the Nokia 3310 LCD works with 2.7 to 3.3 V! Careful!
Instructions
Lcd
First we need to extract/salvage the LCD from the Nokia 3310 mobile phone. Be extremely careful and patient during this process, because as you know the display is just a thin piece of glass that is very sensitive.
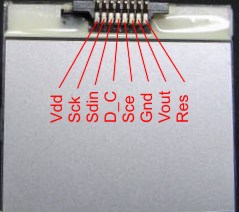
There is an 8 pin connector on the back of the display, in our case it's glued to the glass (Nokia 3210 has “rubber” connectors so this one is much easier to use). This is a Phillips PCD8544 display, it can be easily found on the net if you want more information about it.Instructions
Lcd
First we need to extract/salvage the LCD from the Nokia 3310 mobile phone. Be extremely careful and patient during this process, because as you know the display is just a thin piece of glass that is very sensitive.
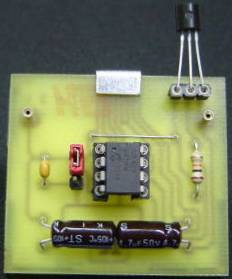
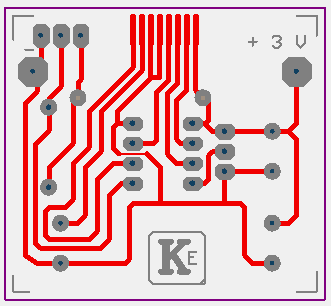
The second step is making the board which is small and isn't that difficult to make. Pay close attention while gluing the plastic edges on the board because they will be holding your LCD. Double check connector positions before gluing. In the bottom corners I glued two plastic separators so the LCD leans on them and not the solder points.
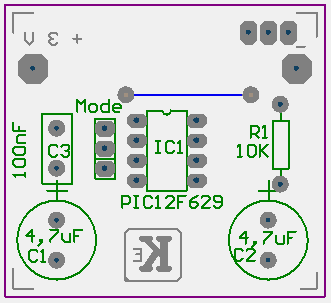
Layout of elements
On the back side we can see the layout of elements, they aren't hard to find and there aren't that many of them.
I placed the temperature sensor DS18B20 in a socket for testing purposes, it is also possible to connect the sensor at a distance by adding wire (I haven't tested 1 wire sensors at a distance yet).
elements/components
Downloads
You can download the program for this thermometer here:
Nokia LCD Thermometer – PIC12F629 - in hex
Nokia Lcd Thrmometer - PIC12F675 - in hex
You can download the circuit and PCB here:
Nokia Lcd Thermometer - made in Protel 99 SE
Nokia Lcd Thermometer.pdf - PCB in pdf
Since I have noticed that there is a problem with programming these microcontrollers you should read the short how-to for programming PIC12F629 / PIC12F675 microcontrollers.
This device was just a test and I hope to have many more circuits that utilize this LCD soon because I'm very fond of its easy implementation.


No comments:
Post a Comment
saran dan coment teman teman sangat membantu pertumbuhan blog ini,terimakasih