Custom Search

Saturday, August 28, 2010

DIY Led Mood Lamp

After making my pyramid mood light with 12 high power leds, i decided to make a bigger and better version, without the emphasis on the low budget.. After all, the pyramid mood lamp was more of a proof of concept with its shortcomings. I wanted the new mood lamp to be more powerful, so it could also be used in daylight conditions. I did this by using a z-power 3 Watt RGB power led. This one led is far more powerful than the 12 ones combined i used before. The colors also mix better because of the wider opening angle and because the rgb chips lay very close together. But you better see it for yourself (please note: all foto's are clickable for a biogger version):
Led Mood Lamp Led Mood Lamp
Offcourse a video says more than pictures, so here you can see the different operation modes.
I also was not that satisfied with the diffused look of my previous led lamp in the shape of a pyramid. I had to use sandpaper to transform the transparant plastic casing into a diffused one, but when you look closely you could still see some areas weren't as diffused as others. And so beginneth my quest for a bigger casing which had to be already diffused...
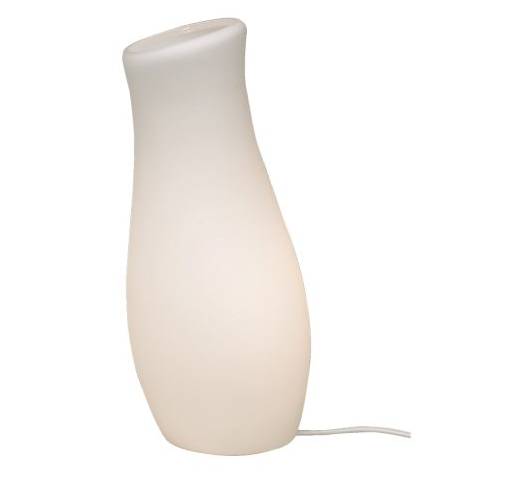
And i found the perfect housing! Behold: the Mylonit table lamp from Ikea.
They come in two sizes: 31 and 45 cm high. Offcourse i bought the biggest version. Funny thing is Ikea already offers this lamp in different colours. But they all can only light up in one color, the lamp i made can take all colors of the rainbow.
Parts You Need

Here is a list of the components i used for making the led mood lamp.
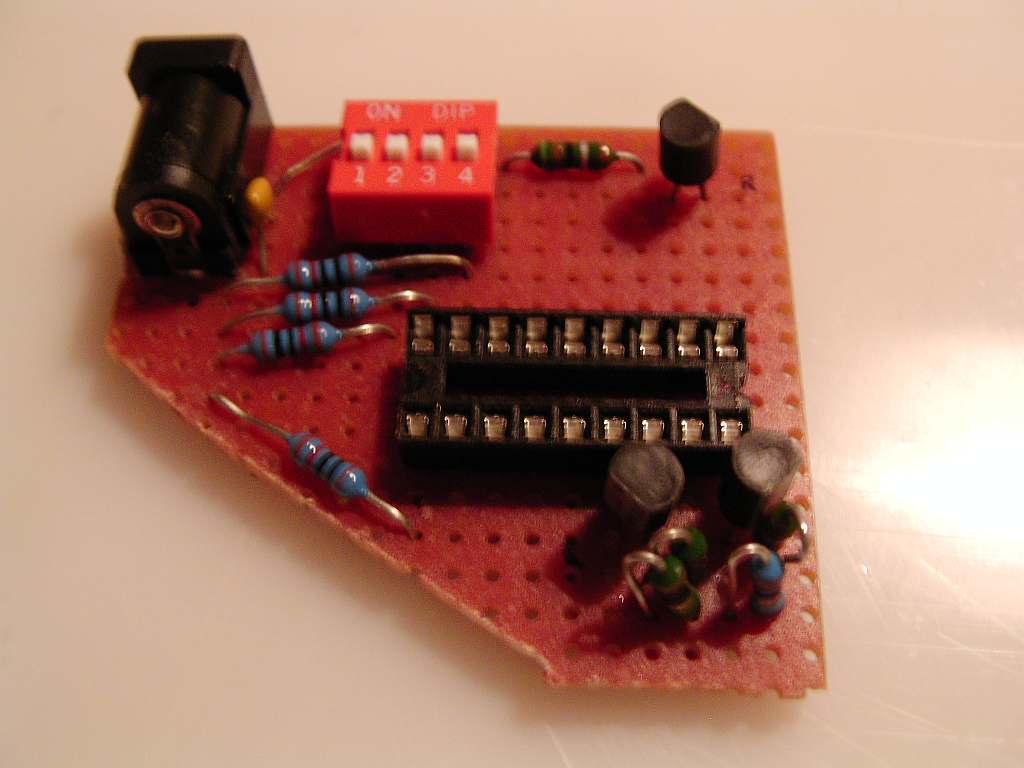
  • 3 NPN transistors capable of driving 500 mA, for example the BC337

  • one PIC16F628(A) and a programmer

  • a small perforated circuit board

  • some 1 watt resistors (5, 10 and 15 Ohm) and a DIP switch

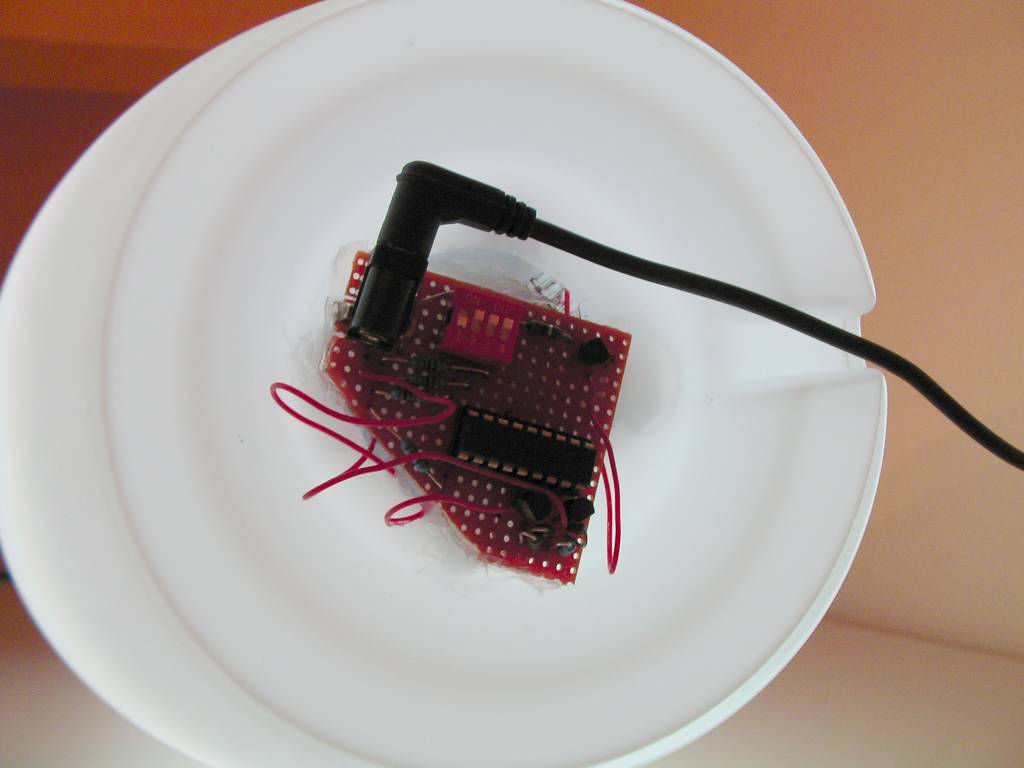
  • a power supply (5 V, 1000 mA)

  • Ikea Mylonit lamp

  • silicon paste from your local DIY shop

  • one z-power 3 Wt RGB led

  • a little heatsink and some cooling paste

Here you see the z-power led mounted on a heatsink i took from an old video card. I drilled two holes and two screws hold the star shaped led in place. To conduct the heat better i used some left over cooling paste that came with my cpu. A smaller heatsink would suffice as well, but i had this heatsink gathering dust in my closet, so...
Here you see the z-power led mounted on a heatsink i took from an old video card. I drilled two holes and two screws hold the star shaped led in place.
To avoid a shortcircuit i first dipped the screw heads in some silicon paste and left it to dry. If you take a closer look at the power led, you can see the 3 individual chips for the 3 colors. This led is so bright it's almost impossible to look directly into it. Then i started building the circuit after calculating the values of the resistors. I changed the calculated values a bit by maxing each color out and looking at the color of white it produced, as i'm not a such a fan of cold, blueish white.I like a warm tone better. This was how my test setup looked like:
This was how my test setup looked like
The Circuit Board
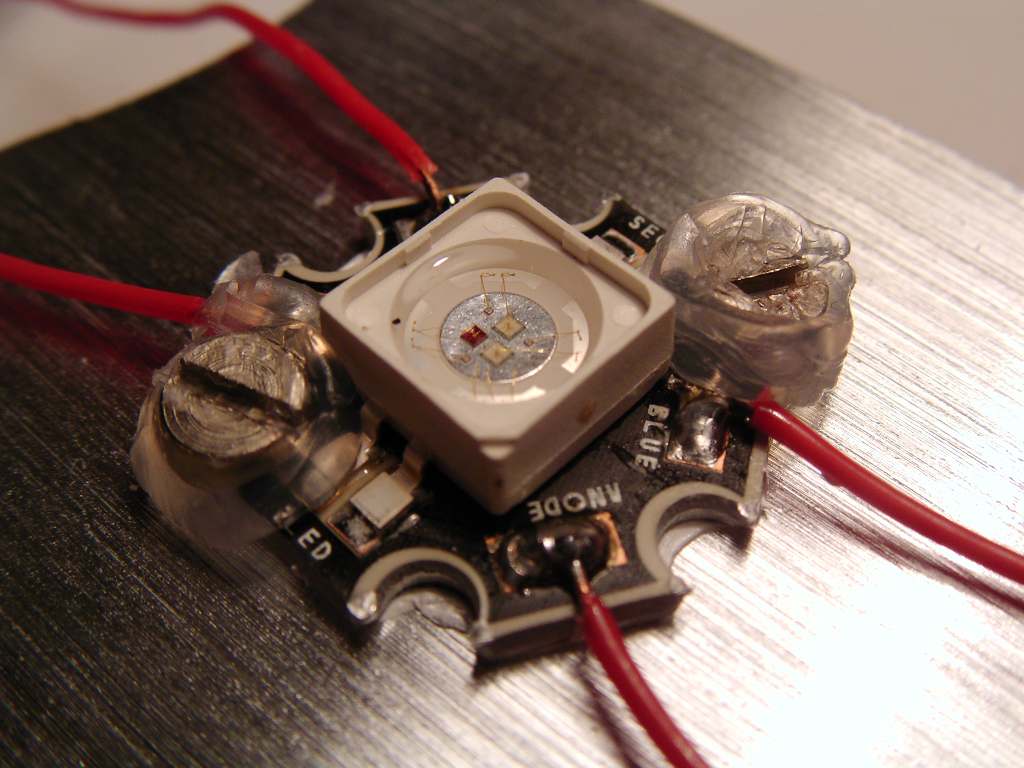
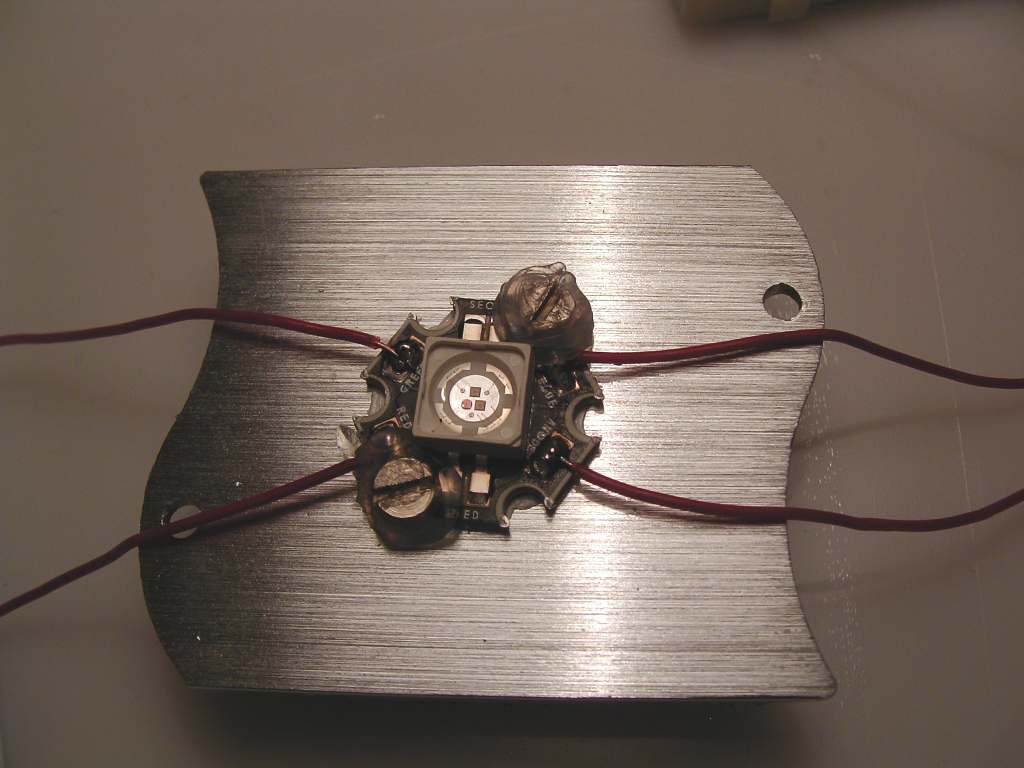
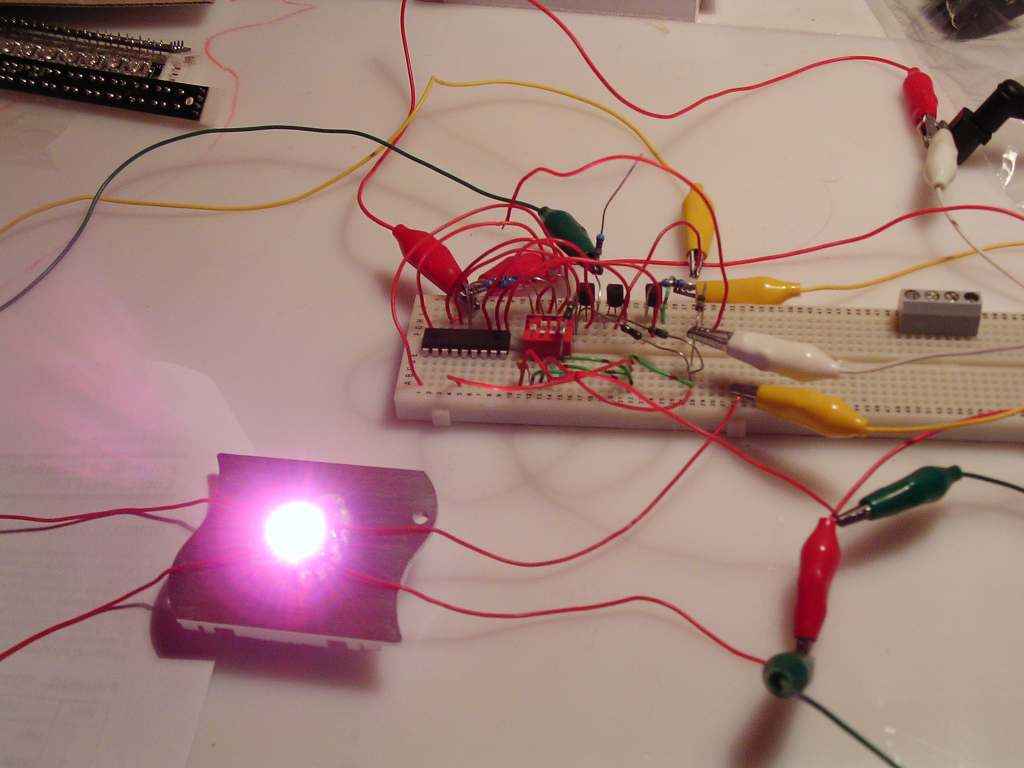
Once everything was working like i wanted i soldered it all onto a small circuit board.
I cut off one corner to get a better fit in the area under the lamp. This is the schematic i used
All i needed to do now was pasting it all together to the lamp and soldering the 4 wires from the led to the circuit board.
Programming PIC16F628 Microprocessor
I have used most of the code of my pyramid lamp again, but i changed some bits (litterally). Because i now have 4 switches (the one for switching the lamp on and off isn't used anymore, now i use a power supply) i wanted to add a random function. So you still have the fade and jump to different preprogrammed colors modes, but these modes now also work with random colors calculated on the fly. All of this combined with one switch to choose between two different speeds and another one to pause at any color the lamp is showing that moment.

Here is the source code along with some guidelines to program the pic.

It isn't that hard to program the pic. I uploaded the hex code to the pic with this very simple pic programmer and a program called ic-prog.

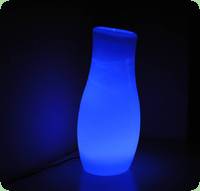
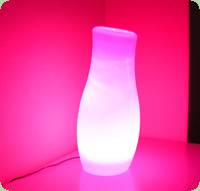
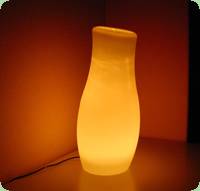
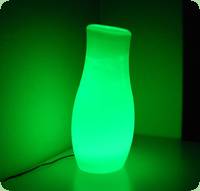
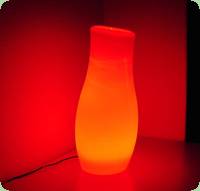
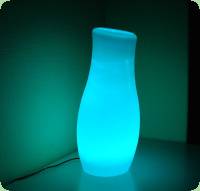
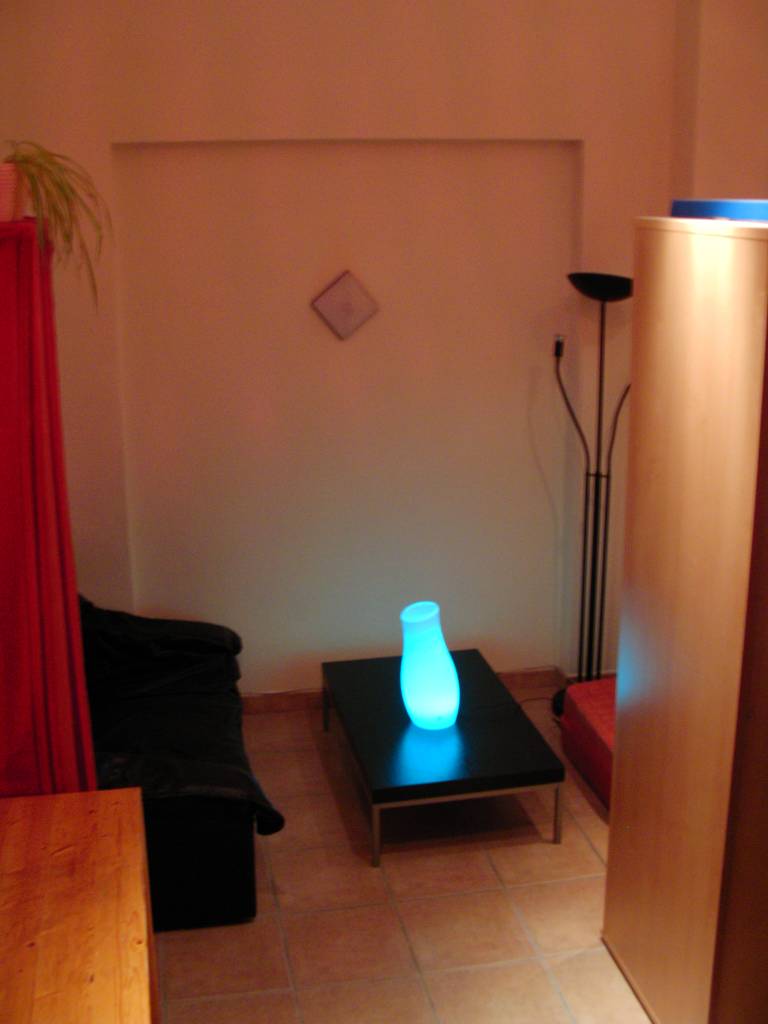
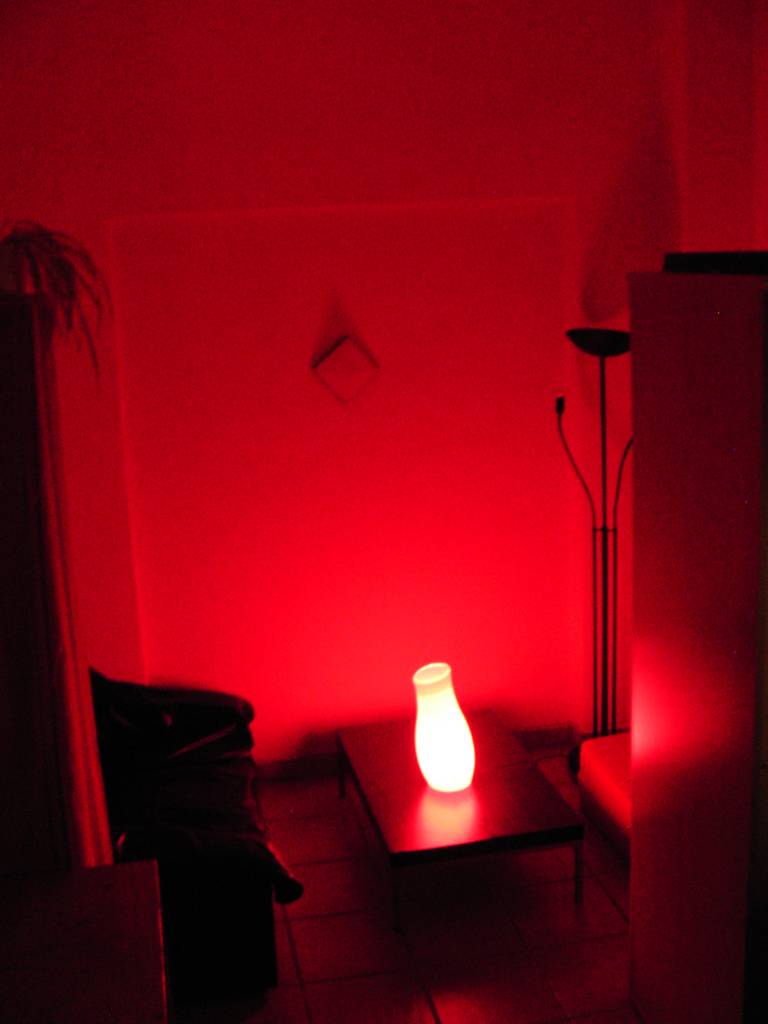
I am really satisfied with this lamp. This was what i was aiming for when i first got the idea of building my own mood lamp. I think this version definitely deserves the title 'mood lamp' because it can light up a whole room with its colors. On the left you can see the lamp still shines strong with other lights on and on the right you can see the effect when all other lights are out. In the back you can see the pyramid lamp i made earlier.
On the left you can see the lamp still shines strong with other lights on and on the right you can see the effect when all other lights are out. In the back you can see the pyramid lamp i made earlier

No comments:

Post a Comment

saran dan coment teman teman sangat membantu pertumbuhan blog ini,terimakasih

My Headlines

Laman